General settings
Name your study and set the study language.
Learn how to set up and use UXtweak
Explore possibilities with demo studies and results

Export and analyze insights faster. Sync your favorite tools with UXtweak
Resources for mastering research, design and product
Definitions of UX terms and phrases
UX insights and tips to sharpen your skills

Studies published in peer‑reviewed journals and industry publications.
Watch our quick, educational UX videos
Listen to top researchers share their stories, wins, lessons
In this help, we’ll discuss how to use the General tab to:

Localization, respondent identification. restrictment of access with a password, automatic closing of your study and more…

Name your study and set the study language.
Select one of the following respondent identification options:
Unless the study is left anonymous, the respondent won’t be allowed to go forward until they identify themselves.
The respondent’s identification will be displayed next to their study results.
If you selected Other identifiers, by enabling Allow duplicate identifiers, you can allow multiple respondents to use the same identifier (e.g. to identify members from the same group).
By default, your study won’t store the IP addresses of respondents. You can enable them with the Store respondent IP address option.
The password has to be between 1 and 250 characters long, with no additional demands on the type of characters.
Don’t forget to share the password with the intended respondents! 🙂
By finishing a study, you make sure that it stops collecting data from more respondents. You can finish a study both manually and automatically:
Even when you set a study to finish automatically, you can always finish it manually when you want to by clicking the Finish button.
If a deadline is reached while some respondents are still working on completing the study, these respondents will be allowed to finish up.
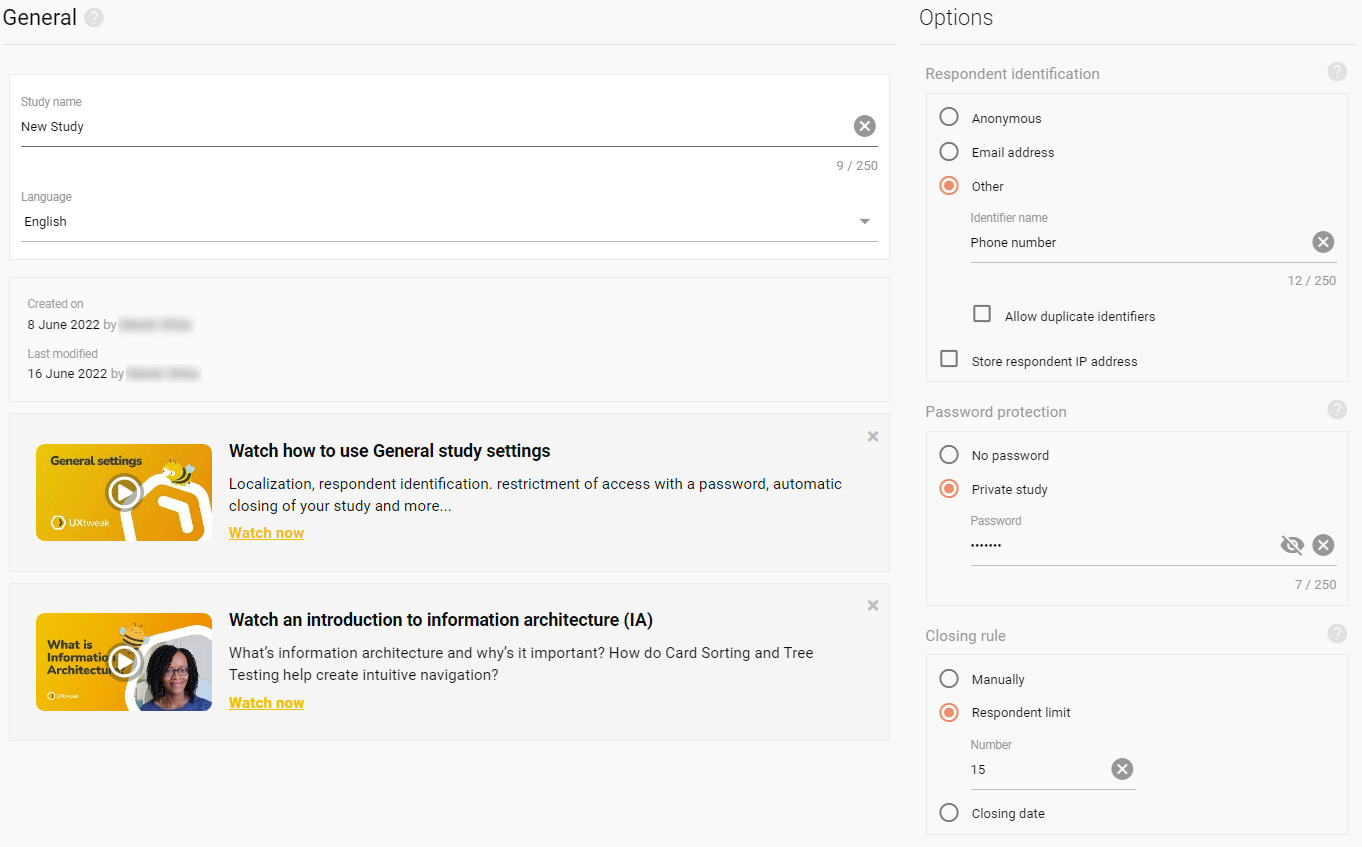
Decide whether and how you want to identify the respondents. Whether you want to protect access to the study with a password. Set rules for ending the study automatically.